Showing posts with label leak. Show all posts

Monday, March 9, 2015

How to Fix Galvanic Corrosion

Galvanic Corrosion is an electro/chemical process in which one metal corrodes preferentially to another when both metals are in electrical contact, in the presence of an electrolyte. wikipedia.com

In plumbing the process takes place when pipes, made of different metals, are joined together. Most often this is copper and galvanized steel water pipe. Water in the system, along with minerals and various chemicals contained in drinking water, provides the electrolyte bath. The most common occurrence is at water heaters where copper water pipe connects to the steel tank of the heater.
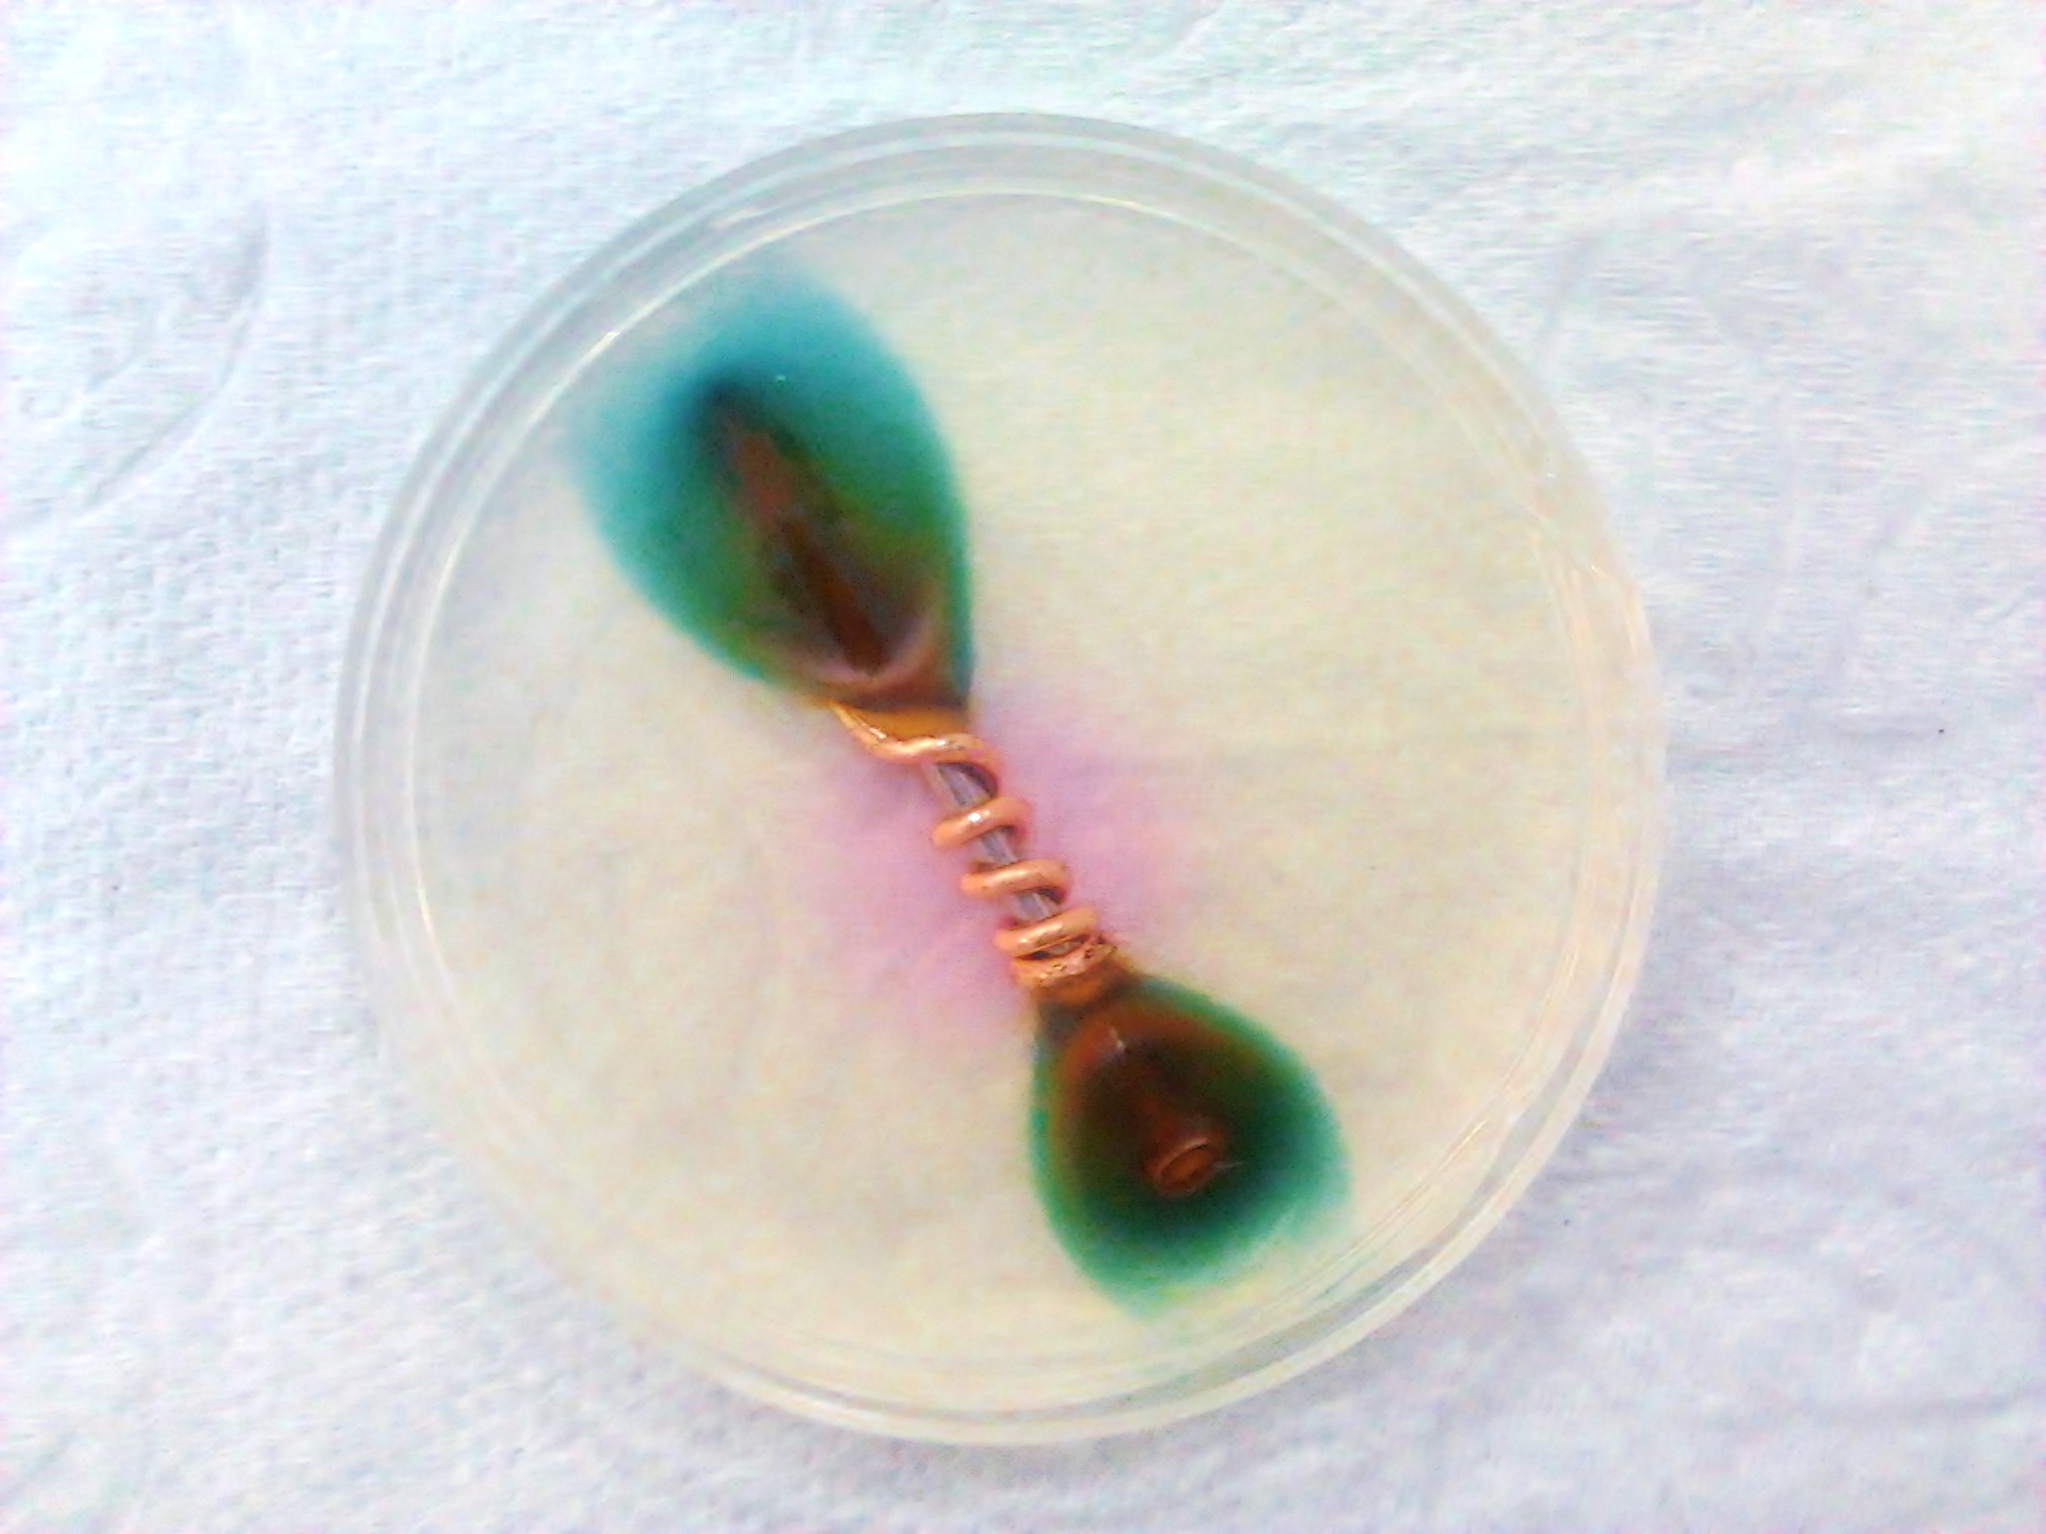


As you can see in the photo, the iron nail is being corroded by the copper wire. In galvanic corrosion the greater the difference of electro-potentials of the metals the faster corrosion takes place. In the case of copper and galvanized steel the difference is quite large, even greater than the iron nail shown. In situations where copper pipes are directly connected to steel pipes the steel corrodes quickly.

If we have a water heater, which has a steel tank with two threaded steel outlets, and copper adapters are screwed directly into those outlets, it is only a matter of time before the steel corrodes and the tank begins to leak. When the tank begins to leak there is no choice but to replace the heater.

So why does anyone connect copper pipes to a steel water heater tank, and how can we make a connection that will not cause corrosion?

People make direct connections because they don't understand galvanic corrosion and/or they don't know the proper way to connect dissimilar types of pipe. The goal is simply to keep the dissimilar metals away from each other. Teflon tape or pipe joint compound on the threads will not accomplish this! We need better isolation. In the picture below you can see that the copper adapters which were connected directly to the water heater tank have been removed and replaced by isolating nipples.


The nipples used in the tank are “dielectric nipples” made of a non-conductive allow and lined with plastic. This breaks the electrical bond between the dissimilar metals and also with the water (electrolyte) inside the pipe. From there I used a heavy brass push-on fitting to eliminate the need of soldering.

We could also use a dielectric union. They use a rubber gasket between the union faces and a plastic collar between the union nut and the copper part of the union to isolate the dissimilar metals from contact. The goal again is to keep the dissimilar metals and the electrolyte bath provided by the water inside the pipe from making contact.

We have looked at water heaters, but anywhere copper meets steel is a potential for corrosion. In older homes and buildings galvanized water mains are often replaced or repaired using copper tubing without proper isolation. This only causes already corroded pipes to corrode faster. Anywhere copper or brass meets steel dielectric nipples and/or fittings should be used for the transition.

As you can see in the picture above it is not a difficult nor expensive procedure to properly isolate your steel water heater tank from the copper water lines attached to it, and it could prevent the very costly need to replace a corroded and leaking water heater. Dielectric nipples are available in pairs for under $10 (USD) and push-on fittings are around $6 (USD) each, so for less than twenty-five bucks you can save yourself from having a corroded water heater. That replacement could run over a grand!

Monday, February 16, 2015

How to Fix a Dripping Faucet - DIY

Laying in bed at three in the morning, head pounding from a long day or a long night, blissful silence filling the air, until – drip. The sound of a single drop of water falling less than a foot to crash into the bottom of a sink. The most annoying sound in the universe. Then another. And another.
After a few minutes, an eternity at three in the morning, the sonic torture could drive even a more stable person to rip the faucet from the sink and hurl it through the window. But that really wouldn't help, would it, other than the momentary pleasure brought on by wanton destruction.
Fixing a dripping faucet is a fairly simple task, though not at three in the morning, so let's just quiet it for now and I'll tell you how to fix it after you've had some sleep.
There are two small valves, appropriately called stops, underneath the sink cabinet. Turn the handles clockwise until they, well, stop. Now turn the faucet on to relieve the pressure then turn it back off. No more drip.
Now if you don't want to battle through the mass of junk stuffed under the sink cabinet, to find those little stops, or if you aren't coherent enough at three in the morning to puzzle out which way clockwise is, we have an alternative. Grab a sock or a knee-high, slide it over the dripping spout and let the rest lay in the sink. The drip will wick silently down the hosiery, and into the sink, letting you go back to sleep.
In the morning you can call a plumber or fix it yourself. It really isn't that hard. The first thing you'll need to know is what brand the faucet is. The manufacturer's name is usually marked somewhere on the main body of the faucet. 


The most common type of faucet uses a cartridge to control the flow of water; either a single cartridge that controls both hot and cold, or two separate cartridges. Some older faucets have stems with washers on the bottom that can be replaced, and some even use a ball and gaskets. First thing to do is remove the handle(s), after you have found and turned off those little stops we were talking about buried deep within the cabinet.
If the faucet has two handles, they will most likely have a Phillips-head screw in the top that holds them secure. This may be covered by a small plastic cover. If your faucet has a single lever, there will most likely be a small Allen-head set screw at the handles base. Some fancy designer handles have special ways to remove them. If you have that kind of faucet, you're on your own.
Beneath the handle(s) you'll find a nut. This nut holds the stem in place. Remove the nut and the stem will screw out, if that's the type of faucet you have, and you can replace the rubber washer, held on by another Philips-head screw, on the bottom. After you replace the washer, just put it all back together.
It is more likely you'll have a cartridge. There will be a small retaining clip that holds the cartridge in place. Remove the clip and the cartridge will slide out. Take it with you to the hardware or home improvement store to match. Remember what the name brand is, it will help narrow the search down. Slide in the new cartridge, slip in the retaining clip, and put it all back together.
If you removed the handle and there is a dome shaped packing nut, you probably have a single lever Delta faucet. You can purchase a Delta repair kit that comes with everything you'll need: a ball, gaskets, springs, even a nifty little wrench. Screw off the dome shaped packing nut, remove the ball-stem, the rubber gaskets (yes Delta is the original “Washerless Faucet ” – it has gaskets) and the little springs under the gaskets (that are not called washers). Just put the new parts in where you took the old parts out and you're done.
Now you are ready to brave the jungle under the sink again and turn the stops back on, slowly. Just turn them on about a half turn then look for leaking water around the packing nuts, make sure the faucet will turn on and off, look for leaking water again and tighten or loosen the packing nut if needed (too tight makes the faucet hard to operate, too loose and it leaks around the stem). If it's all good, turn the stops all the way on (counterclockwise), and you're done.
Not bad work for a hungover Saturday morning, and you saved enough money to go out Saturday night. And just think of the bragging rights!